Footwear for Achilles recovery isn't one decision — it's a progression. The shoe that protects you coming out of the boot is not the shoe you want to be in five years from now. Staying in a high heel-drop shoe long-term keeps the posterior chain in a shortened position, which is one of the factors that increases Achilles vulnerability in the first place.
This guide is structured in three phases: what to wear immediately after the boot, what to transition toward during active rehab, and what the long-term target looks like once the tendon has fully remodelled.
Heel-to-toe drop is the height difference between the heel and the forefoot in a shoe. A 10mm drop means the heel sits 10mm higher than the toes — tilting the foot forward and reducing how much the Achilles and calf have to work. Zero drop means heel and forefoot are level, as in barefoot walking.
Higher drop protects a healing Achilles by shortening the loading range. But the same mechanism that protects it short-term keeps the tendon and calf in a chronically shortened position if continued indefinitely — gradually reducing flexibility and strength through the full range of motion.
Transition rule: Change drop by no more than 4–6mm at a time, spending at least 4–8 weeks at each level. After an Achilles rupture, be more conservative — discuss timing with your physiotherapist before stepping down.
The toe box is the front section of the shoe that houses your toes. It has three distinct dimensions — and most shoes only address one of them. Understanding the difference helps you choose footwear that genuinely suits a recovering foot, particularly if swelling is present.
Why it matters during recovery: Foot swelling post-boot commonly affects both the ball of the foot and the toes. A shoe that compresses the toes alters toe-off mechanics and loads the Achilles differently on every step. Toes that can splay freely also engage the intrinsic foot muscles — important for rehabilitation. Each shoe below is rated on its toe box in the spec row.
The hard reality — toe box and heel drop rarely come together. The brands that build genuinely wide, anatomical toe boxes — Altra and Topo — are philosophically committed to low or zero drop. The brands that offer high heel drop for early recovery protection — Brooks, ASICS, HOKA, New Balance — use conventional tapered lasts. There is currently no mainstream shoe that combines a 10–12mm heel drop with an anatomical toe box. You are choosing between two clinically desirable features and will likely have to compromise one for the other.
The two paths: Accept a narrower toe box and choose a high-drop Phase 1 shoe as recommended below — most people manage fine, particularly for the duration of early recovery. Or choose a shoe with an anatomical toe box and a lower drop, and use a heel lift insert to compensate for the reduced heel elevation. A Topo Phantom 3 (5mm drop) with a 10–12mm heel lift insert, for example, gives approximately equivalent Achilles protection to a 15–17mm drop shoe while maintaining a genuinely wide toe box. Sizing up half a size is usually necessary when adding a thick lift.
The wide fit caveat: Choosing the wide version of a conventional shoe addresses metatarsal width only — it does not reliably widen the toe box at the tips. For a full explanation of the three dimensions and how to assess any shoe — read our toe box guide → · See heel lift options →


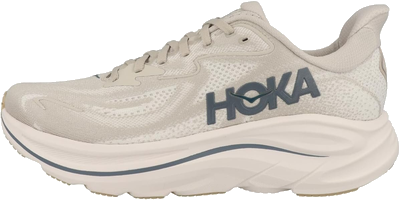
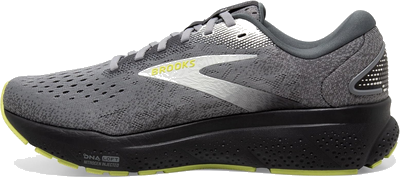
The Bondi 9 is one of the most commonly recommended shoes for Achilles recovery, and for good reason. The thick foam reduces peak ground reaction forces, the extended heel geometry protects the Achilles insertion, and the rocker sole means you reach toe-off with less plantarflexion range required from the tendon.


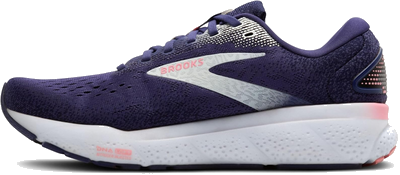
The highest-drop shoe on this list at 12mm, the Ghost 16 maximally shortens the Achilles loading range — ideal for the earliest stages out of the boot when any load on the tendon feels significant. The DNA Loft v3 foam is soft and forgiving underfoot, and the fit is reliable and widely available in multiple widths.


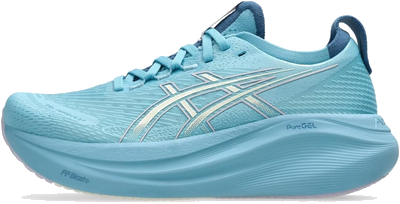
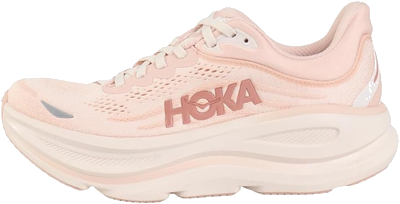
The Nimbus 26 sits at a useful middle ground — 8mm of drop reduces Achilles loading without going to the extreme of 12mm. The FF Blast+ Eco foam and Gel cushioning make it exceptionally comfortable on longer walks, and the width options accommodate swelling that can persist during early recovery.


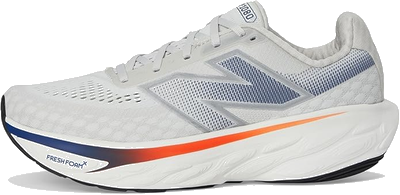
The 1080v14 sits at 6mm drop — slightly lower than the others in Phase 1, making it a natural bridge into Phase 2 territory. The Fresh Foam X midsole is exceptionally plush, the toe-off feel is smooth, and it handles the transition back to running better than the Bondi or Ghost. A good choice once early walking is established and return to running is beginning.


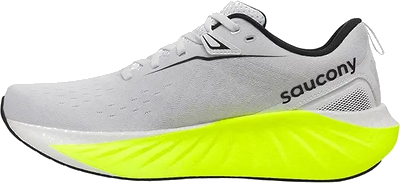
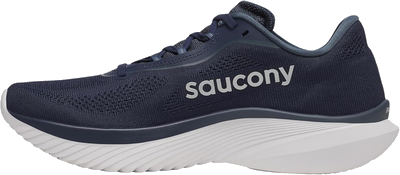
The Triumph 22 is Saucony's maximum cushion flagship. PWRRUN PB foam provides exceptional cushioning and energy return at 10mm drop - within the Phase 1 range while feeling lighter than the Bondi or Ghost. A strong choice for those who want maximum cushioning without the platform feel of HOKA.


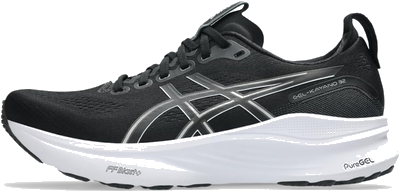
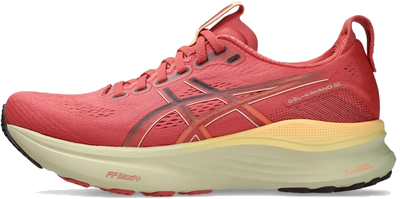
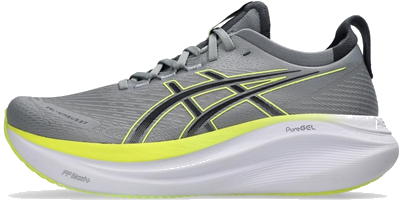
The Kayano 32 is ASICS's premier stability shoe. The 4D GUIDANCE SYSTEM provides adaptive stability, FF BLAST PLUS foam delivers generous cushioning, and PureGEL rearfoot technology is notably softer than previous versions. If you overpronated before injury, the Kayano 32 is the Phase 1 stability recommendation over the neutral Nimbus 26.


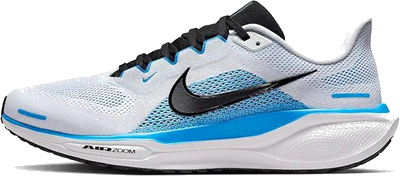
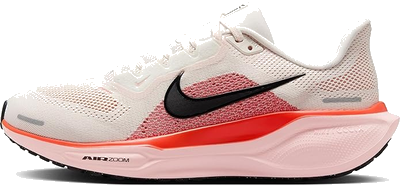
The Pegasus is Nike's iconic daily trainer — one of the most recognisable running shoes in the world. At 10mm drop the Pegasus 41 sits comfortably within the Phase 1 recovery range. The dual Air Zoom units and ReactX foam midsole provide reliable cushioning underfoot. The wide version is available and recommended for recovery patients experiencing foot swelling. The toe box does taper toward the tips — if toe box width is a priority, consider the Topo Phantom 3 instead. A solid option for those who want a familiar, trusted brand during recovery.


The Phantom 3 is an ideal first step down from high-drop Phase 1 shoes. At 5mm, it introduces slightly more Achilles loading without the shock of going directly to 4mm or below. The wide, anatomically shaped toe box allows the toes to spread naturally — important for foot intrinsic muscle rehabilitation — and the dual-density ZipFoam provides real cushioning with enough firmness to maintain ground feel.


The Kinvara 15 is the lightest, lowest-drop shoe in Phase 2 — a step closer to the long-term target. At 4mm with a lower stack height than most cushioned trainers, it provides real ground contact and demands more from the posterior chain. Best introduced after several weeks in the Phantom 3, and initially for shorter runs and speed work rather than long easy miles. The flat (non-rockered) geometry means the foot and Achilles do more of the work — which is the point.


The Cloudmonster 2 is On's maximum cushion shoe. The biggest CloudTec pods provide excellent impact absorption while the Helion midsole adds energy return. At 6mm drop with a forefoot rocker it sits between the Topo and Kinvara, engaging the posterior chain more than Phase 1 shoes while offering significant cushioning. Stylish enough for gym and everyday use as well as running.


The Torin 7 is Altra's neutral daily trainer and the most recommended entry point to zero-drop running after injury recovery. The 30mm of EGO Max foam underfoot provides genuine cushioning protection while the heel and forefoot sit at exactly the same height — the foot is in its natural, balanced position on every step. The wide FootShape toe box allows the toes to splay and engage the foot's intrinsic muscles. This is the shoe for when the tendon is strong, training is consistent, and the goal shifts from recovery to long-term resilience.


At 8mm drop the Cascadia 17 is the most conservative trail option - right for walking trails during recovery before running returns. The Trail Adapt System provides stability over variable terrain and DNA LOFT v2 midsole offers good cushioning for longer days on foot. Versatile for hiking and trail running, appropriate earlier in recovery than lower-drop trail alternatives.


HOKA's flagship trail shoe - maximum cushioning combined with Vibram Megagrip outsole for technical terrain. The same protective HOKA platform that makes the Bondi appropriate for road recovery translates well to trail. At 4mm drop introduce it once road running is re-established. Vibram outsole significantly reduces lateral instability risk on uneven surfaces.


The trail equivalent of the Altra Torin - zero drop, wide FootShape toe box, MaxTrac outsole and TrailClaw lugs for grip. Like the Torin, this is a long-term goal shoe. Introduce it for hiking first, alongside Phase 2 trail shoes, before using for running. The Lone Peak is popular for ultra-distance and thru-hiking precisely because zero drop over long distances causes less cumulative posterior chain fatigue than raised-heel alternatives.


Kizik's hands-free entry system is genuinely useful during Achilles recovery - bending down to put on shoes is difficult when non-weight-bearing, and the cage mechanism lets you step straight in without hands or heel crushing. The Athens 2 has a rocker sole, adequate cushioning, and looks that work in most casual and smart-casual settings. Wide toe box options available. One of the most practical everyday shoes across all phases of recovery.
| Shoe | Section | Drop | Stack (H/F) | Toe box | Best for | Approx price |
|---|---|---|---|---|---|---|
| Brooks Ghost 16 | Phase 1 | 12mm | 35/23mm | Moderate — tapers at tips | Earliest post-boot walking, max protection | ~$140 |
| ASICS Gel-Nimbus 26 | Phase 1 | 8mm | 41/33mm | Moderate — stretchy knit | Longer walks, superior shock absorption | ~$160 |
| HOKA Bondi 9 | Phase 1 | 4mm | 39/35mm | Narrow — XW available | Most situations — rocker + max cushion | ~$165 |
| Saucony Triumph 22 | Phase 1 | 10mm | 37/27mm | Moderate — adequate width | Plush cushioning, lighter alternative to Bondi | ~$160 |
| ASICS Gel-Kayano 32 | Phase 1 | 10mm | 40/30mm | Moderate — W available | Stability, overpronation, 4D guidance | ~$160 |
| Nike Pegasus 41 | Phase 1 | 10mm | 36/26mm | Moderate — tapers at tips | Familiar brand, wide version available | ~$130 |
| NB Fresh Foam 1080v14 | Phase 1→2 | 6mm | 38/32mm | Narrow — W available | Return to running, bridges Phase 1 and 2 | ~$165 |
| Topo Athletic Phantom 3 | Phase 2 | 5mm | 33/28mm | Wide — anatomical | First step down, daily training | ~$145 |
| On Cloudmonster 2 | Phase 2 | 6mm | 38/32mm | Moderate | Versatile training, forefoot rocker | ~$170 |
| Saucony Kinvara 15 | Phase 2 | 4mm | 29/25mm | Moderate-narrow | Speed work, shorter runs, closer to zero | ~$120 |
| Altra Torin 7 | Phase 3 | 0mm | 30/30mm | Wide — FootShape | Long-term resilience, full posterior chain | ~$150 |
| Brooks Cascadia 17 | Trail | 8mm | 32/24mm | Moderate | Hiking first, all-terrain trail, most conservative | ~$140 |
| HOKA Speedgoat 6 | Trail | 4mm | 32/28mm | Narrow — W available | Technical terrain, maximum trail cushion | ~$155 |
| Altra Lone Peak 8 | Trail Phase 3 | 0mm | 25/25mm | Wide — FootShape | Long-term trail goal, hiking and running | ~$135 |
| Kizik Athens 2 | Casual | ~8mm | N/A | Moderate-wide | Hands-free entry, work and daily life | ~$130 |